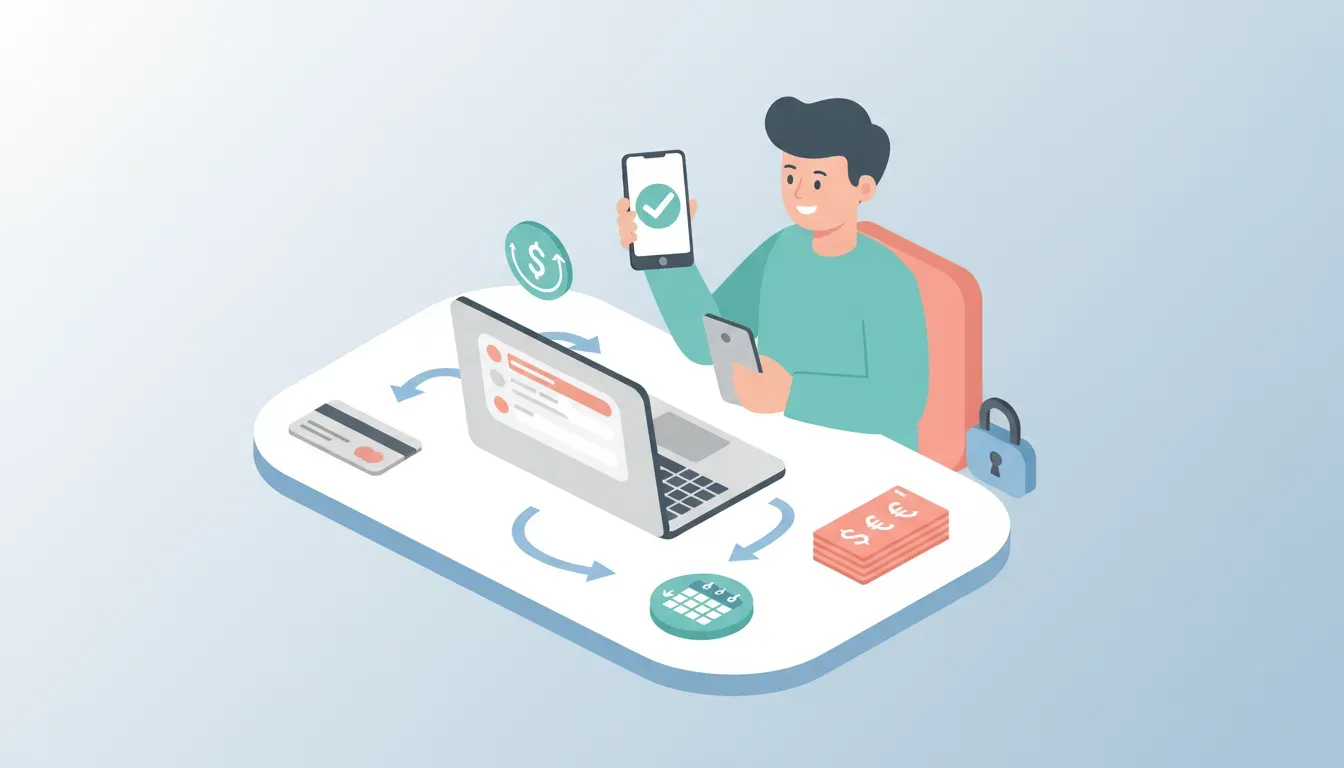
This guide explains how to set up Stripe, accept payments, create payment links and invoices, and manage transactions. It is aimed at small business owners, freelancers, nonprofit organizers, and anyone who needs to collect payments online for goods, services, subscriptions, or donations.
What is Stripe and who should use it?
Stripe is a payment processing platform that lets businesses accept credit cards, wallets, bank debits, and recurring payments online. It is suitable for:
- Online stores and marketplaces
- Freelancers and agencies
- Subscription or membership services
- Nonprofits collecting donations
Quick overview: The basic workflow
The typical flow when using Stripe is:
- Create a Stripe account and verify your business.
- Connect a bank account so payouts land in your account.
- Switch from test mode to live when ready.
- Create products, payment links, invoices, or integrate Stripe into your website.
- Monitor transactions, issue refunds, and manage disputes.
Step 1 — Create your Stripe account
Go to stripe.com and sign up with an email, full name, and password. Stripe supports passkeys and single sign-on if you prefer those options.
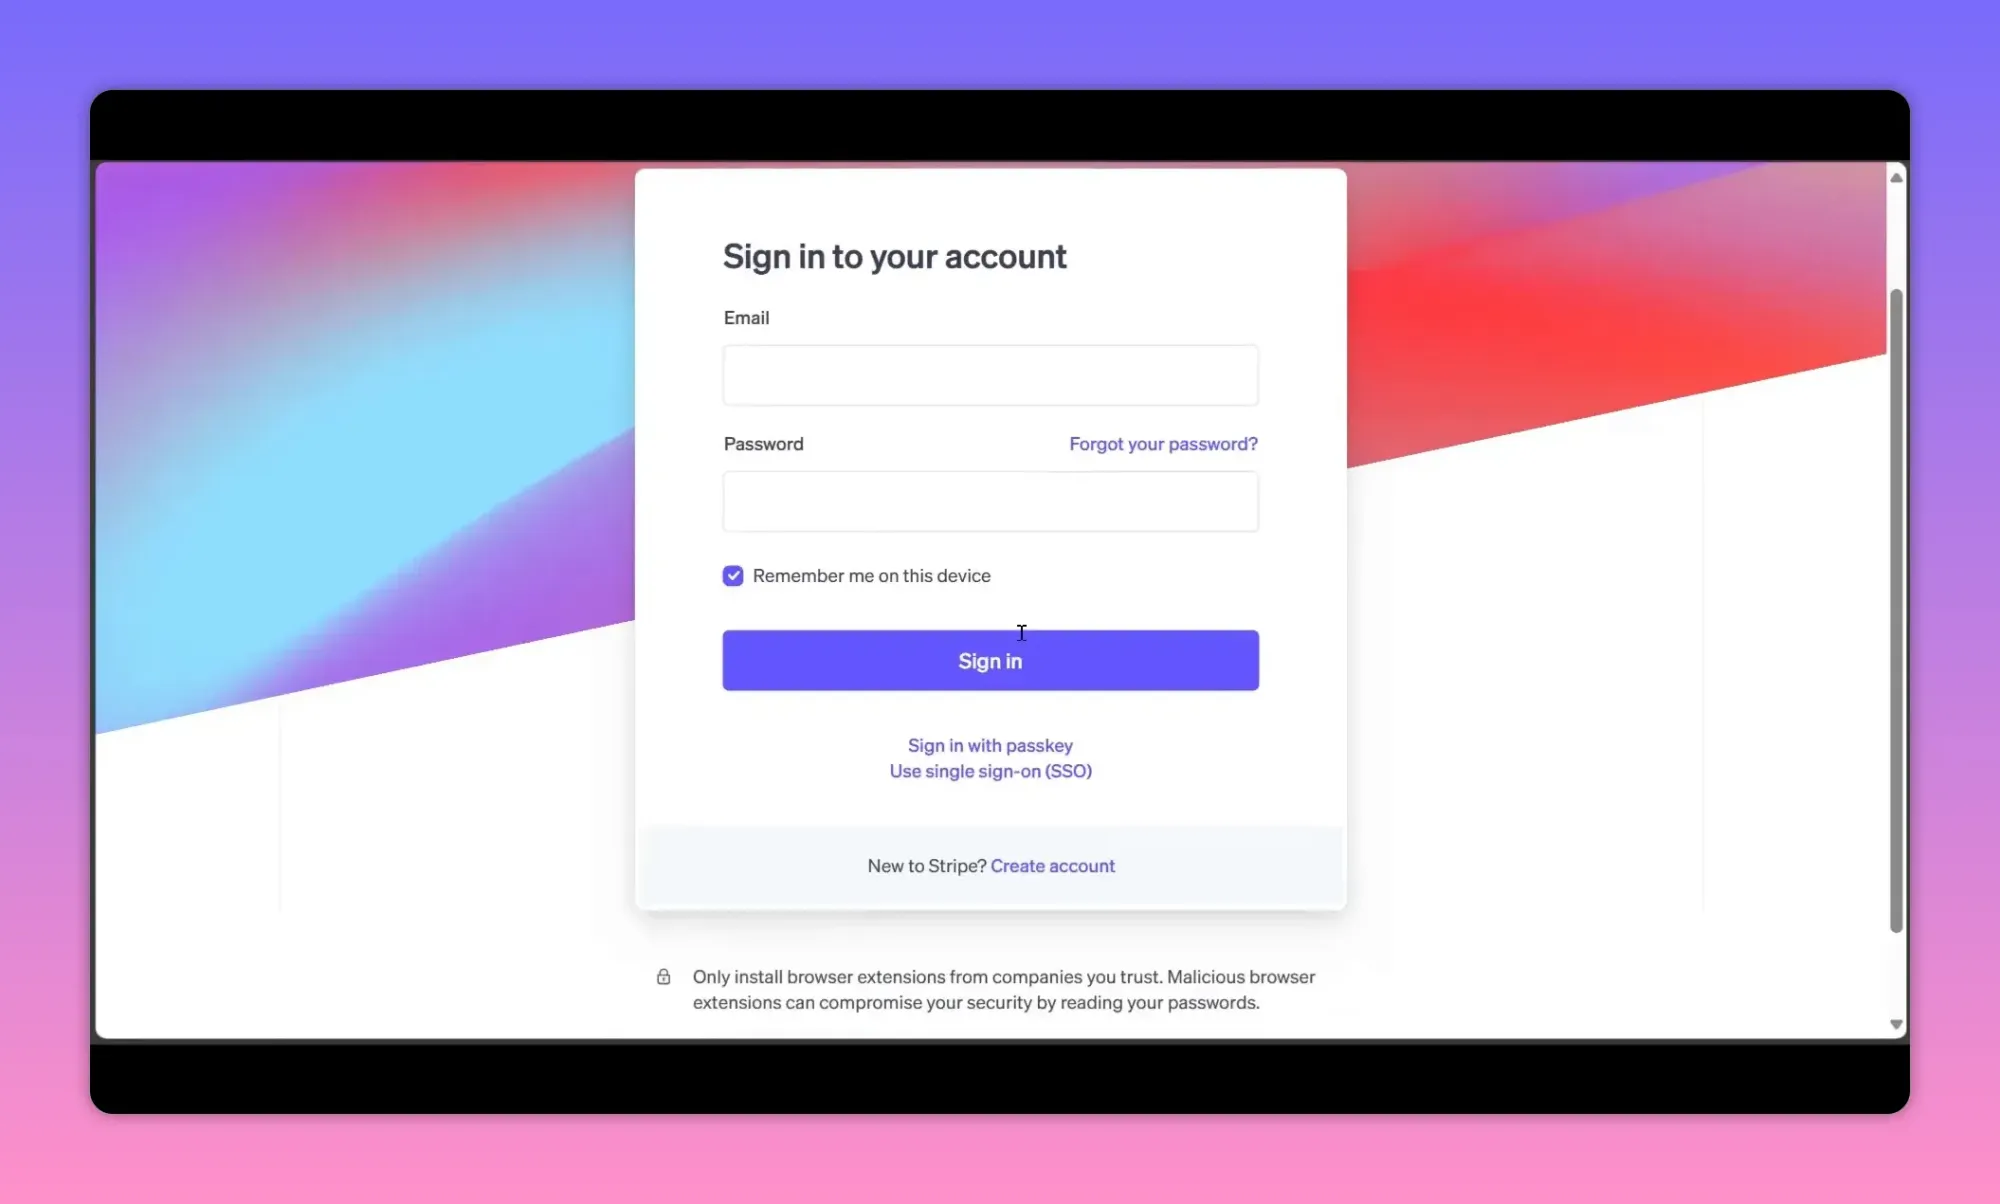
During setup you may get prompts to choose your country and confirm contact information. Use an email you control because Stripe will send verification and account notifications to it.
Step 2 — Complete your business profile (required before going live)
Stripe opens new accounts in test mode until you complete verification. Finish the profile to accept real payments. The required items typically include:
- Business type (individual, company, nonprofit)
- Personal details for the account owner
- Verification document (photo ID)
- Business information (address, website or description of products)
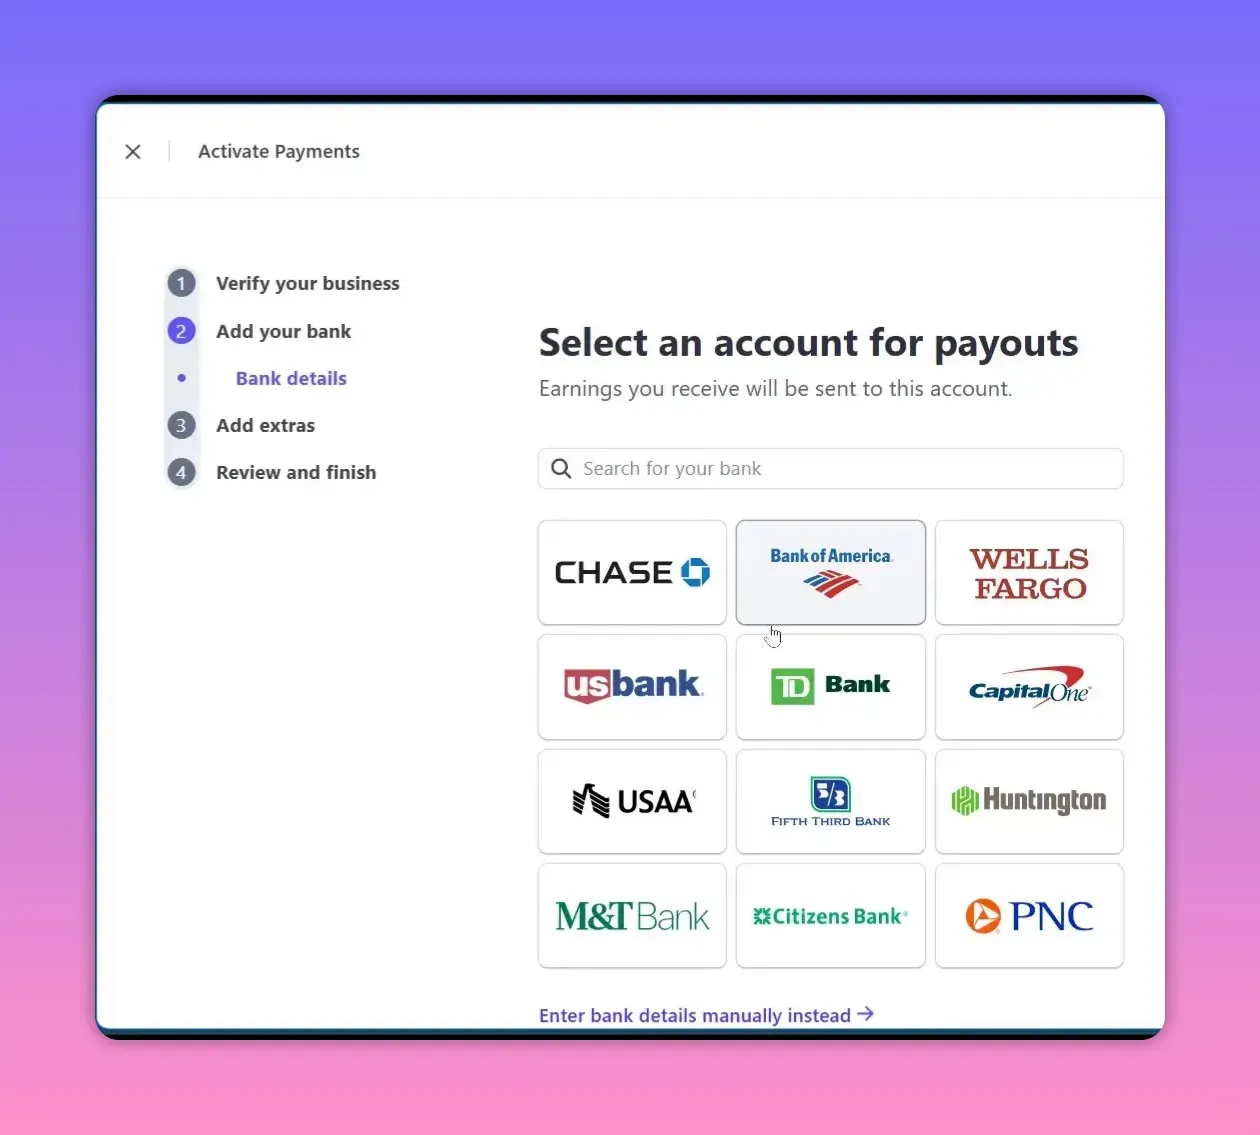
- Bank account details for payouts
If your bank is not listed, enter routing/account numbers manually. Also consider enabling tax collection automation if you sell taxable goods.
Step 3 — Dashboard tour: where to find things
The Stripe dashboard contains a left sidebar with key areas you will use frequently:
- Home / Balance — shows available funds and upcoming payouts
- Payouts — schedule and history of transfers to your bank
- Transactions — full list of payments, refunds, disputes
- Customers — store customer profiles, cards, and billing data
- Products / Pricing — create products, prices and manage catalog
- Payment Links & Invoices — quick ways to collect payments without code
Step 4 — Connect your bank and understand payouts
Add the bank account where you want Stripe to deposit funds. Payout timing depends on your country and business history; expect an initial delay for new accounts. Stripe shows upcoming payout dates and any reserves or holds under Balance.
Step 5 — Create products and payment links (no code required)
Payment Links let you accept one-time or recurring payments without a developer. Use the Product Catalog to define items and prices, then generate a link or embed checkout.
- Create a product or choose "Pay what you want" for donations and tips.
- Set currency, preset amounts, and optional minimum or maximum limits.
- Customize the call-to-action button text (Pay, Donate, Book).
- Enable advanced options: limit purchases, add custom fields, or collect tax IDs.
- Publish the link and share it via email, social media, or your site.
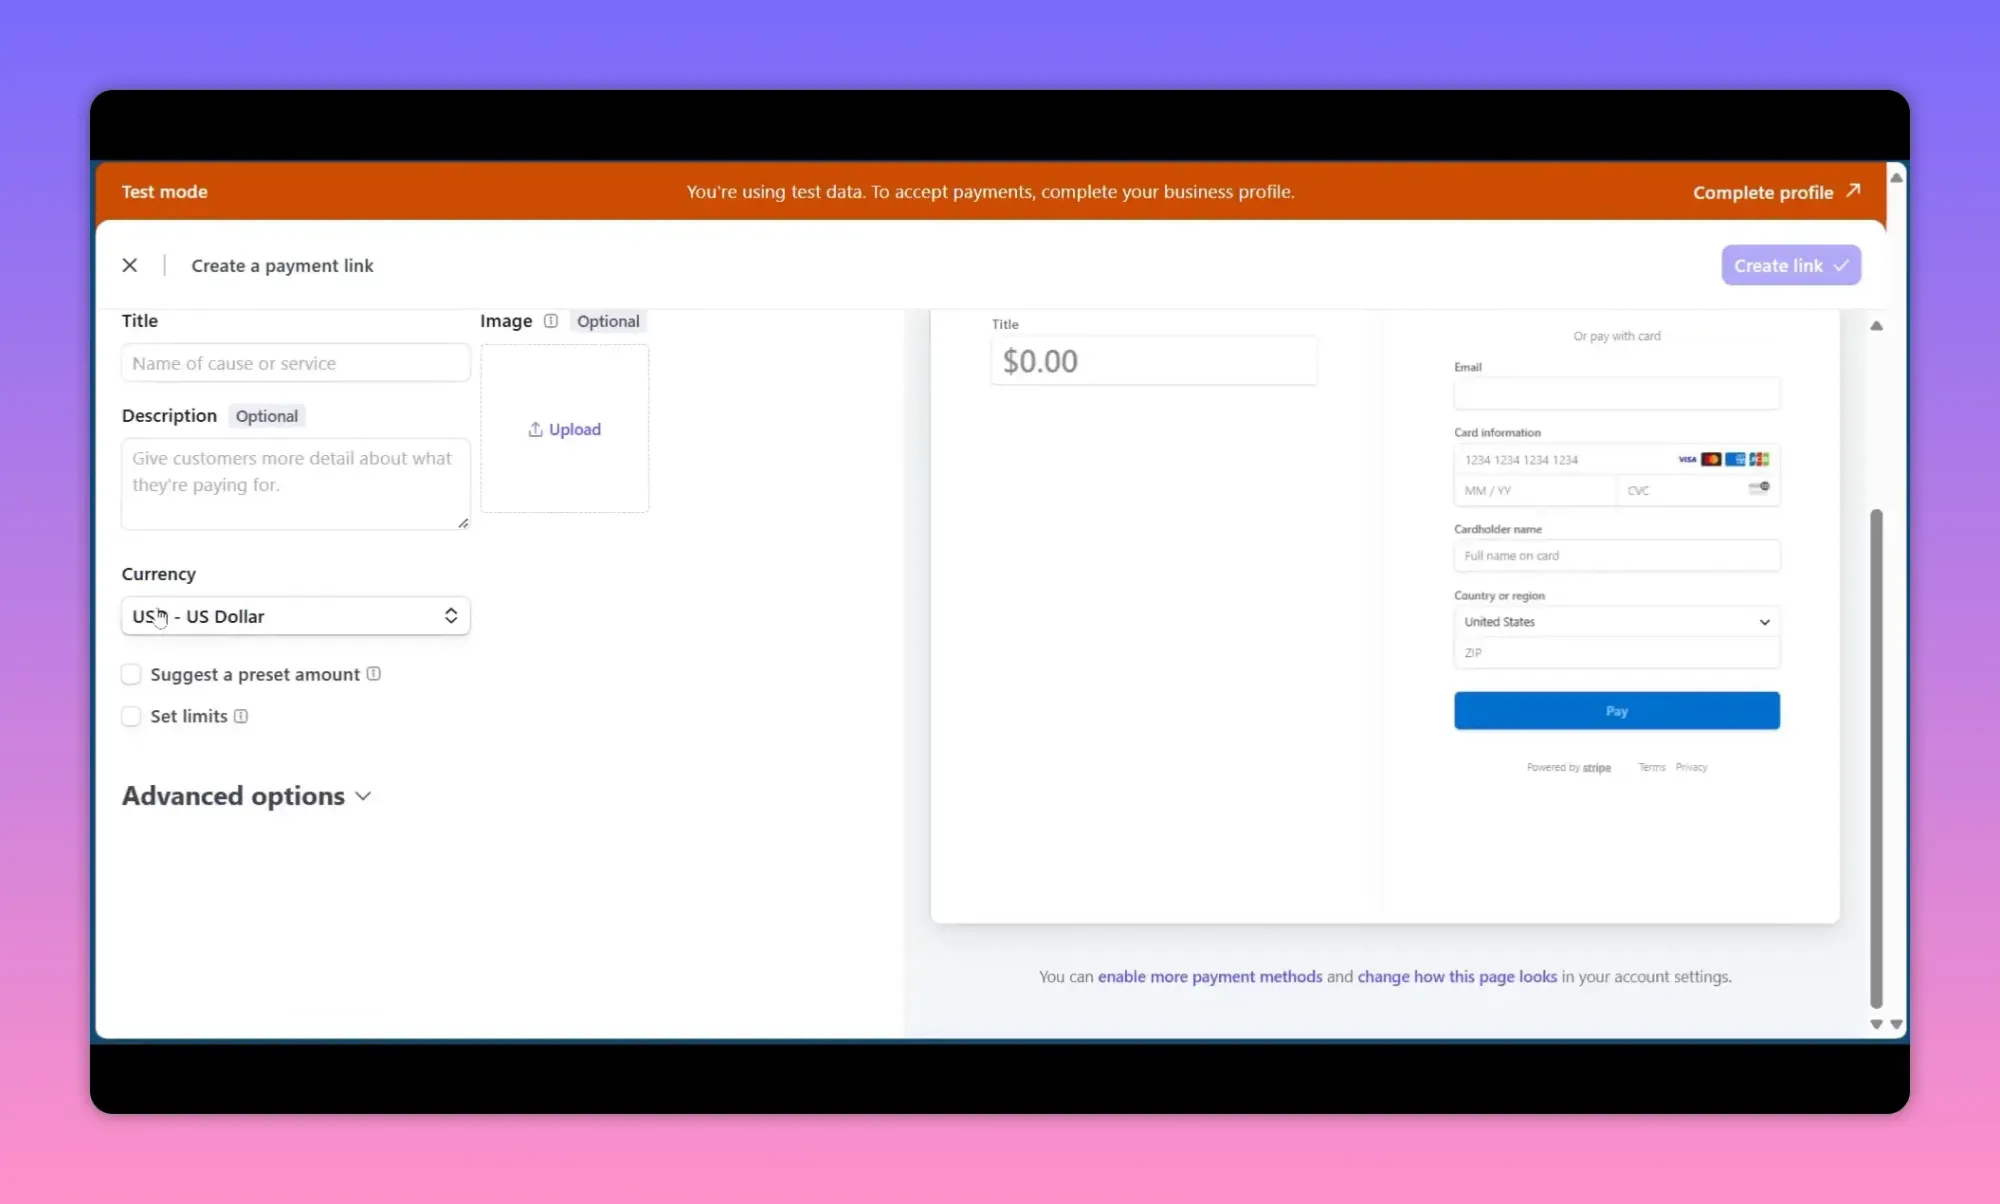
Use the preview that shows desktop and mobile views before sharing the link.
Step 6 — After payment: confirmation pages and invoices
Configure a confirmation message that buyers see after payment to reduce confusion. If you want, enable automatic PDF invoices to be emailed to the payer. Note that Stripe may charge a small fee per invoice delivery depending on settings.
Step 7 — Testing vs live mode
Keep using test mode while you trial flows. Test mode uses test card numbers and does not process real money. When you finish verification and switch to live, replace test API keys with live keys if you integrated Stripe programmatically.
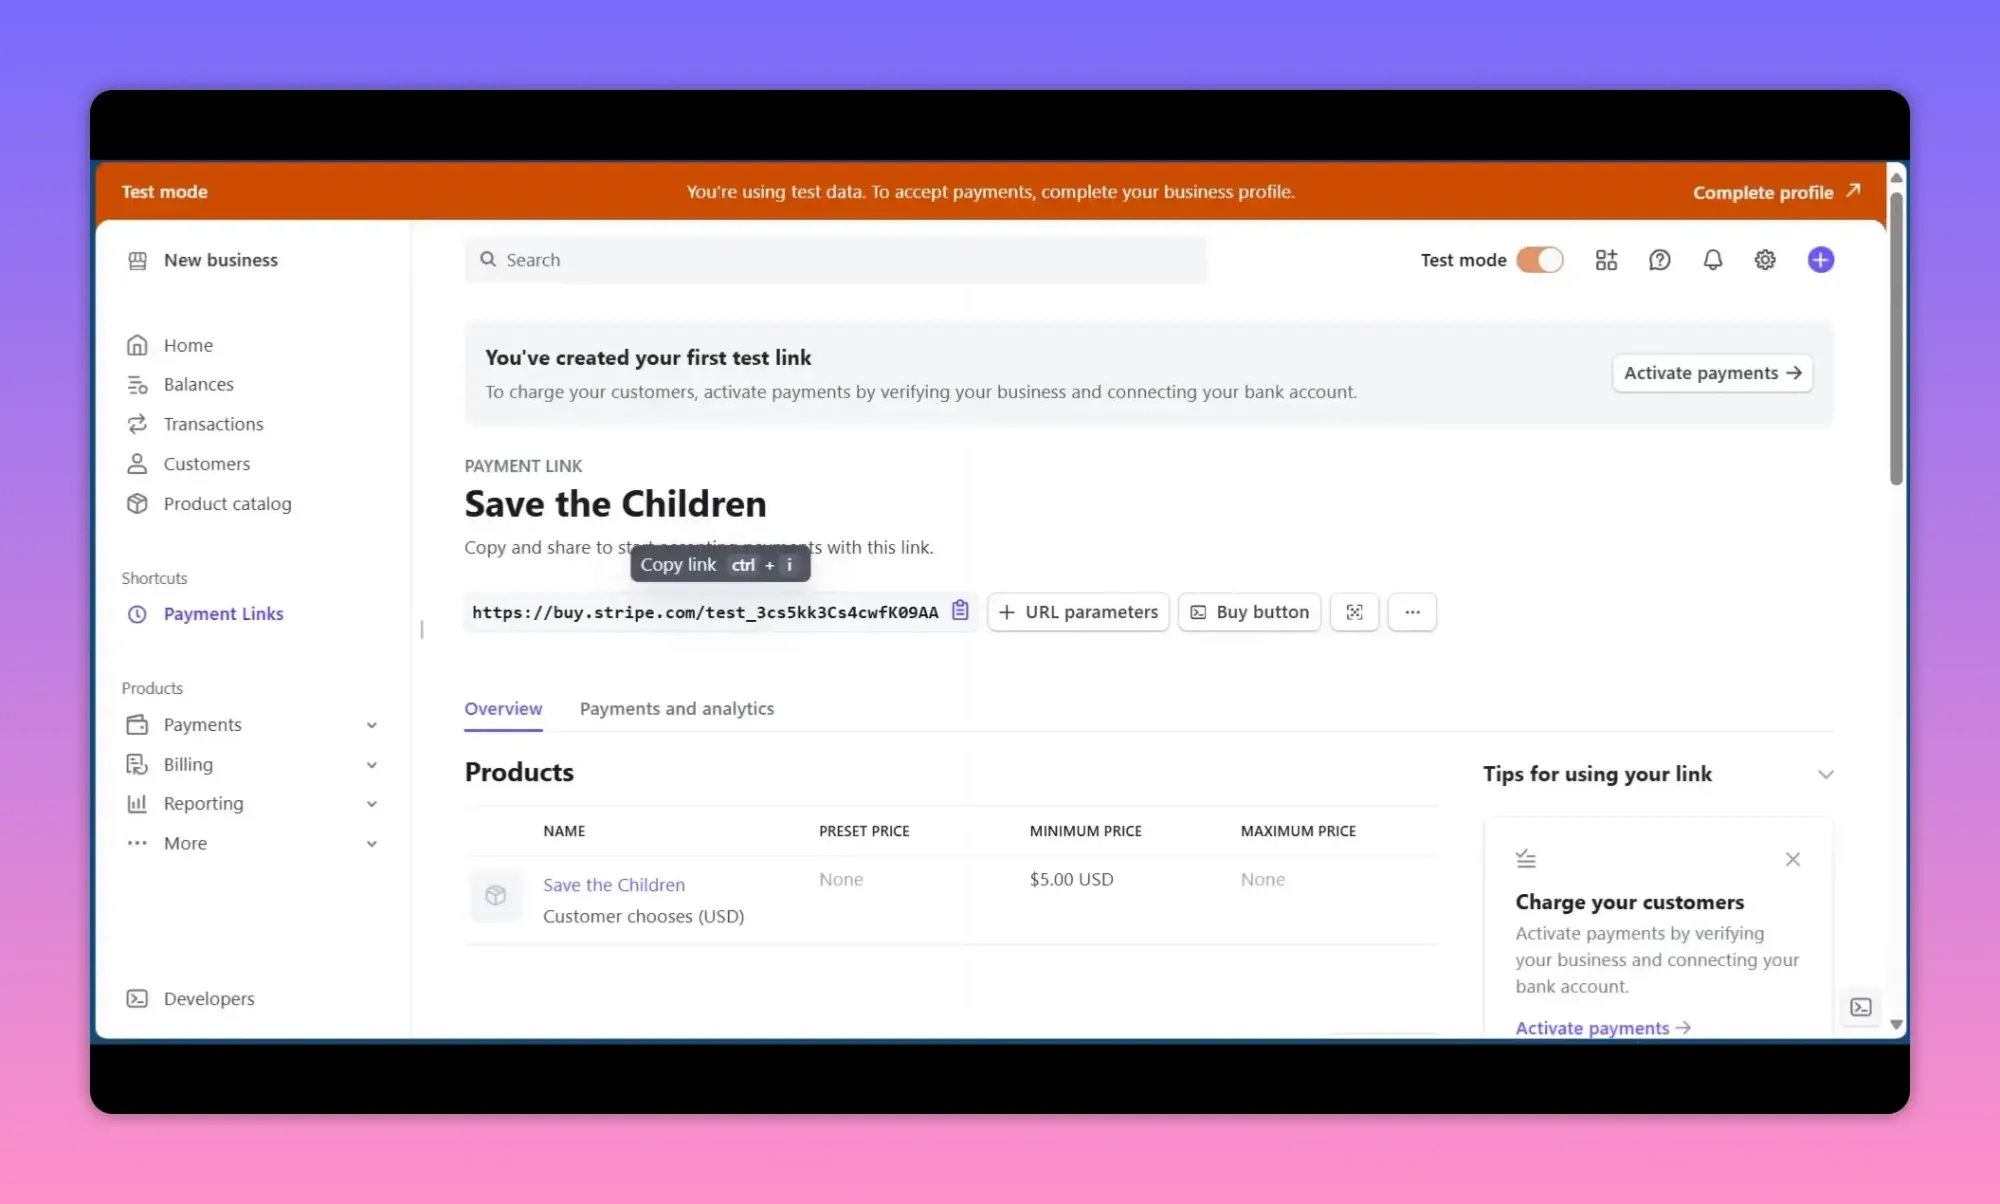
Step 8 — Handling a payment: what happens in the dashboard
After a buyer pays using a payment link, checkout page, or API, the transaction appears in Transactions and the amount moves to your Stripe balance. From there, Stripe processes scheduled payouts to your connected bank.
Managing customers, refunds and disputes
Use the Customers area to save payment methods and manage subscriptions. For refunds and chargebacks:
- Issue full or partial refunds from the Transactions view.
- Respond quickly to disputes with supporting evidence (receipt, proof of delivery).
- Track disputed amounts in the dashboard and watch for reserve holds.
Fees, limits and common pitfalls
Important items to watch for:
- Transaction fees — Stripe charges per successful card charge (varies by country). Factor fees into pricing.
- Invoice fees — optional PDF invoice delivery may incur a small per-invoice fee in some cases.
- Test vs live keys — using test keys in production prevents real charges; using live keys with incomplete verification may restrict payouts.
- Payout timing — initial payout waits can be longer; check your payout schedule in the dashboard.
- Currency conversion — accepting multiple currencies can add conversion fees and exchange rate considerations.
- PCI compliance — Stripe reduces PCI scope via hosted checkout and payment links, but follow best practices if you store card data.
Checklist before going live
- Complete business verification and identity documents.
- Add and verify your bank account for payouts.
- Test the full payment flow in test mode using test cards.
- Set up tax collection if required for your region.
- Configure receipts and confirmation messages for customers.
- Review pricing and factor Stripe fees into your pricing model.
- Switch to live mode and swap API keys if you integrated programmatically.
Frequently asked questions
How long until I receive money in my bank?
Payout schedules vary by country and merchant history. Typical initial payout delay is a few days; later payouts might be daily or weekly depending on your settings.
Can I create recurring subscriptions without coding?
Yes. Use Stripe Billing with the Product Catalog to create recurring prices and subscribe customers via the dashboard or payment links.
What if a customer requests a refund?
Issue full or partial refunds from the Transactions page. Refunds return funds to the customer but do not automatically return Stripe processing fees in all cases; check Stripe’s refund policy for details.
Do I need a developer to accept payments?
Not necessarily. Payment Links, invoicing, and the dashboard let you accept payments with no coding. For advanced integrations or customized checkout experiences, a developer may be helpful.
Short summary
Stripe enables quick, secure payment acceptance with flexible options: direct checkout, payment links, invoices, or full API integrations. Complete your verification, connect your bank, test flows in test mode, then publish payment links or integrate the API when ready. Monitor transactions, manage customers, and keep an eye on fees and payout schedules.
Next steps
Follow the checklist above, create a test payment link to practice, and review Stripe’s documentation for advanced features like webhooks, custom checkouts, and subscriptions when you’re ready to scale.