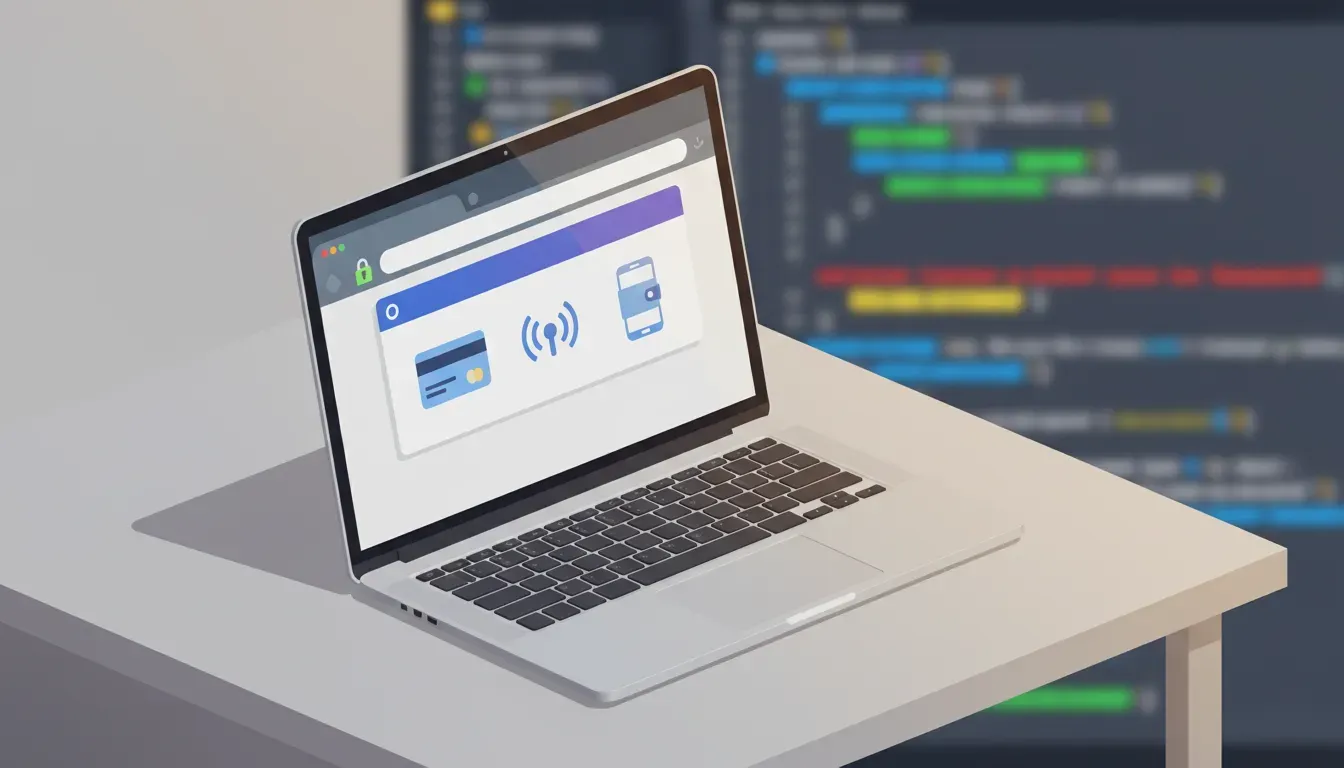
Accepting cards, Apple Pay, Google Pay, and other global payment methods in a Next.js 14 app is straightforward when you use Stripe Payment Element and test locally over HTTPS. This guide walks through a minimal, production-minded integration: create the app, add Stripe Payment Element, build a server API route to create PaymentIntents, confirm payments on the client, and enable HTTPS on localhost (so you can test Apple Pay and Google Pay).
What you'll build
A simple checkout flow where the user picks a payment method exposed by the Stripe Payment Element. The server creates a PaymentIntent with automatic_payment_methods enabled so Stripe returns the payment options available for the user's browser. The client uses that client_secret to render the Payment Element and confirm the payment. Finally, the user is redirected to a success page on completion.
Quick 5-step breakdown
- Create a Next.js 14 app (app router).
- Add Stripe Payment Element to the client.
- Create a Next.js 14 API route handler that creates a PaymentIntent.
- Confirm payment on the client and redirect to a success page.
- Enable HTTPS for localhost so Apple Pay and Google Pay work (use lcl.host).
Step 1 — Create a Next.js 14 app
Start with a clean Next.js 14 app using the app router and TypeScript.
npx create-next-app@latest my-stripe-app
cd my-stripe-app
code .
npm run dev
Delete starter content so you have a blank main layout. Use Tailwind if you prefer a quick UI: Tailwind + Next.js guide.
Step 2 — Install Stripe and Payment Element
Install the official Stripe libraries:
npm install stripe @stripe/stripe-js @stripe/react-stripe-jsCreate a .env.local with your keys (obtain them from Stripe Dashboard). Prefix public keys with NEXT_PUBLIC_.
# .env.local
NEXT_PUBLIC_STRIPE_PUBLISHABLE_KEY=pk_test_...
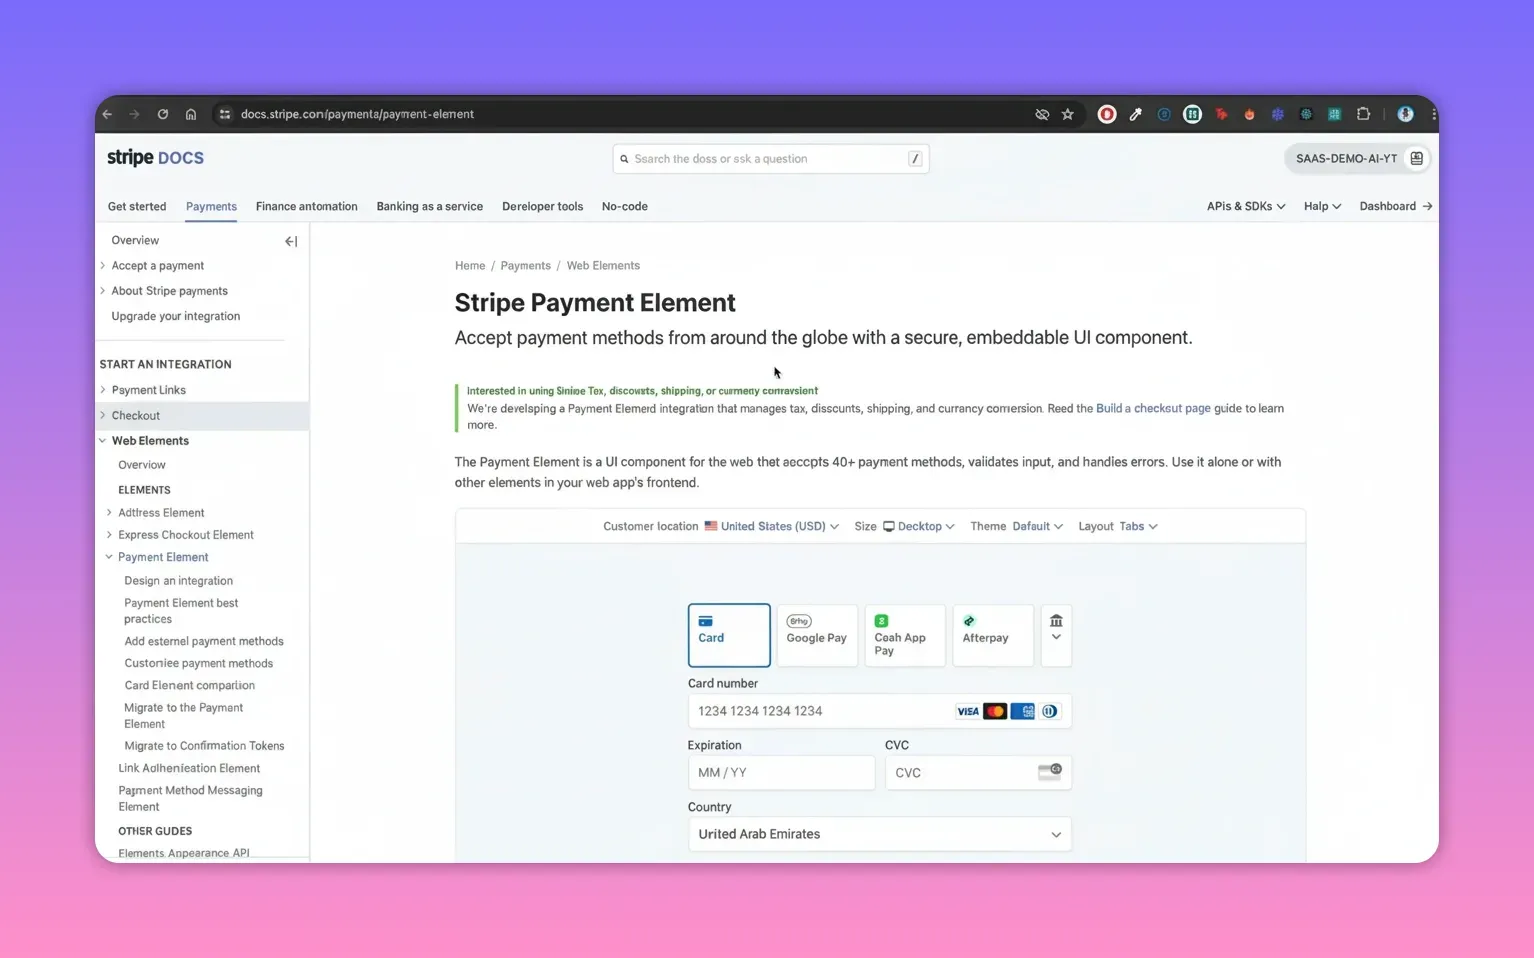
STRIPE_SECRET_KEY=sk_test_...Load Stripe on the client with loadStripe and wrap your checkout UI with <Elements>. The Payment Element is an embeddable UI that shows cards, Google Pay, Apple Pay, and more when available.
Step 3 — Server: create a PaymentIntent route (Next.js Route Handler)
Create an API route that creates a PaymentIntent with automatic payment methods enabled. This route runs on the server and uses your secret key.
// app/api/create-payment-intent/route.ts
import Stripe from "stripe";
import { NextResponse } from "next/server";

const stripe = new Stripe(process.env.STRIPE_SECRET_KEY!, { apiVersion: "2024-08-01" });

export async function POST(request: Request) {
  try {
    const { amount } = await request.json();
    const paymentIntent = await stripe.paymentIntents.create({
      amount,
      currency: "usd",
      automatic_payment_methods: { enabled: true },
    });

    return NextResponse.json({ clientSecret: paymentIntent.client_secret });
  } catch (err) {
    console.error(err);
    return NextResponse.json({ error: "Internal Server Error" }, { status: 500 });
  }
}
Note: Stripe expects amounts in the smallest currency unit (cents for USD). The server returns a client_secret which the client uses to mount the Payment Element and confirm the payment.
Convert dollars to cents helper
// lib/convertToSubunit.ts
export default function convertToSubunit(amount: number, factor = 100) {
return Math.round(amount * factor);
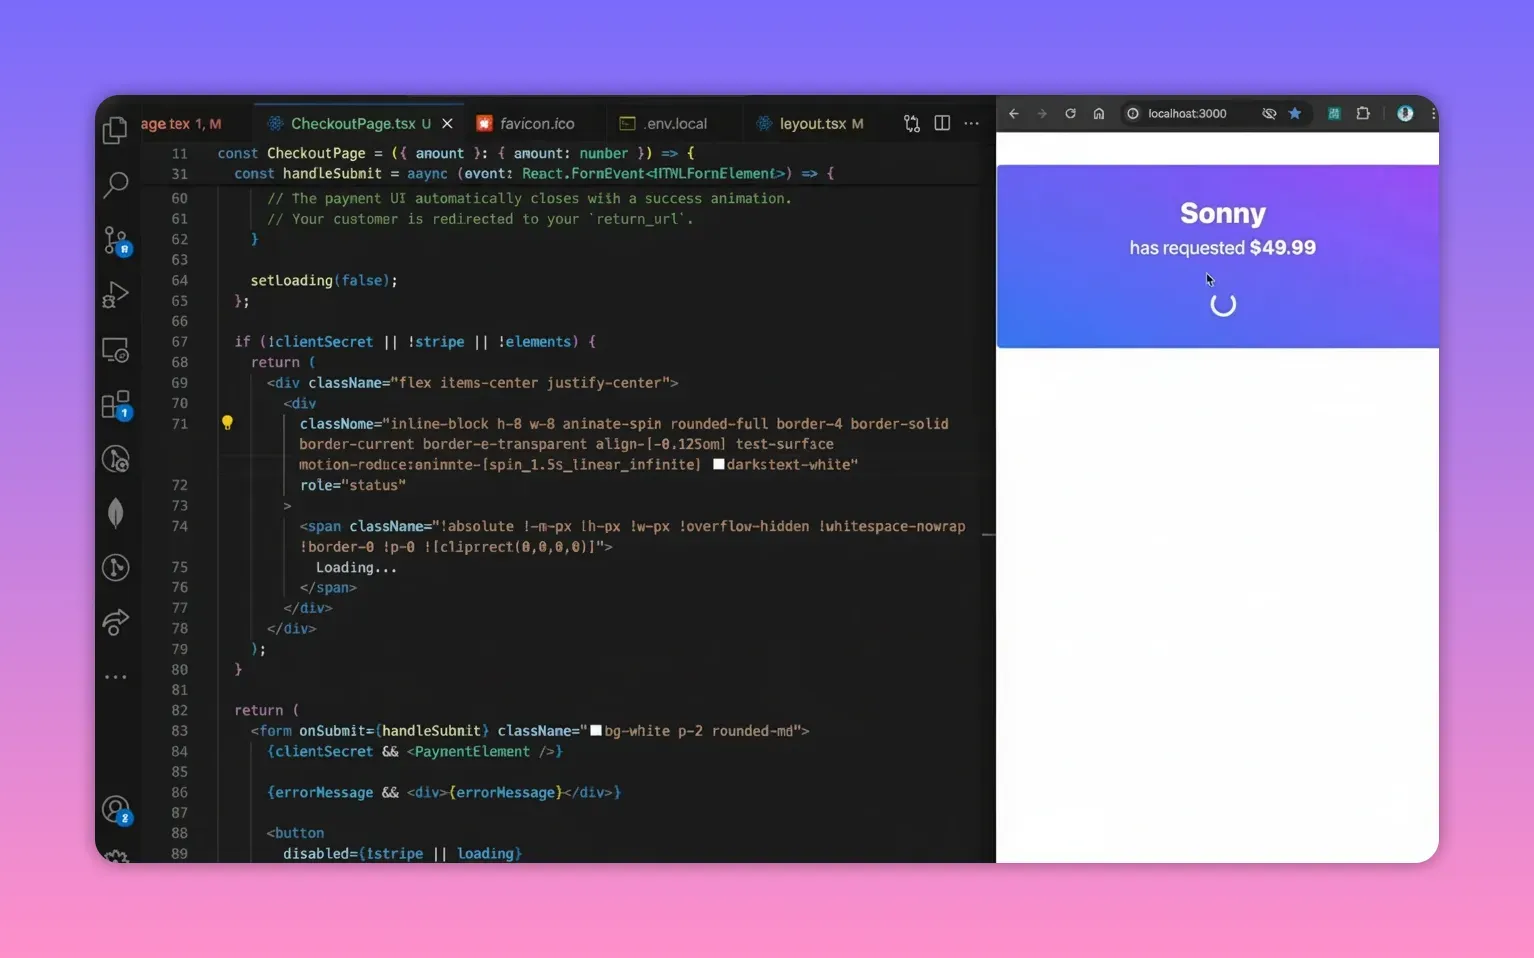
}Step 4 — Client: render the Payment Element and confirm payment
The client fetches a client secret from the API when the checkout mounts or when the amount/payment option changes. When the client secret is present, render the Stripe PaymentElement and handle submission with stripe.confirmPayment.
// components/CheckoutPage.tsx (client component)
"use client";

import { useEffect, useState } from "react";
import { useStripe, useElements, PaymentElement } from "@stripe/react-stripe-js";

type Props = { amount: number; clientSecret?: string };

export default function CheckoutPage({ amount }: Props) {
  const stripe = useStripe();
  const elements = useElements();
  const [clientSecret, setClientSecret] = useState(null);
  const [loading, setLoading] = useState(false);
  const [errorMessage, setErrorMessage] = useState(null);

  useEffect(() => {
    async function createIntent() {
      const res = await fetch("/api/create-payment-intent", {
        method: "POST",
        headers: { "Content-Type": "application/json" },
        body: JSON.stringify({ amount: Math.round(amount * 100) }),
      });
      const data = await res.json();
      setClientSecret(data.clientSecret);
    }
    createIntent();
  }, [amount]);

  async function handleSubmit(e: React.FormEvent) {
    e.preventDefault();
    setLoading(true);
    if (!stripe || !elements) return;

    const result = await stripe.confirmPayment({
      elements,
      confirmParams: { return_url: `${window.location.origin}/payment-success?amount=${amount}` },
    });

    if (result.error) {
      setErrorMessage(result.error.message || "Payment failed");
      setLoading(false);
    }
  }

  if (!clientSecret) return
Loading Payment Form...
;

  return (
    <form onSubmit={handleSubmit}>
      <PaymentElement />
      <button disabled={!stripe || loading}>{loading ? "Processing..." : `Pay $${amount}`}</button>
      {errorMessage && <div>{errorMessage}</div>}
    </form>
  );
}
For testing card payments use Stripe test numbers, for example:
Card number: 4242 4242 4242 4242
Any future expiry, any CVC, any postal code
Spinner / loading UX
Show a spinner while the client secret or Stripe libs are loading so users know something is happening.
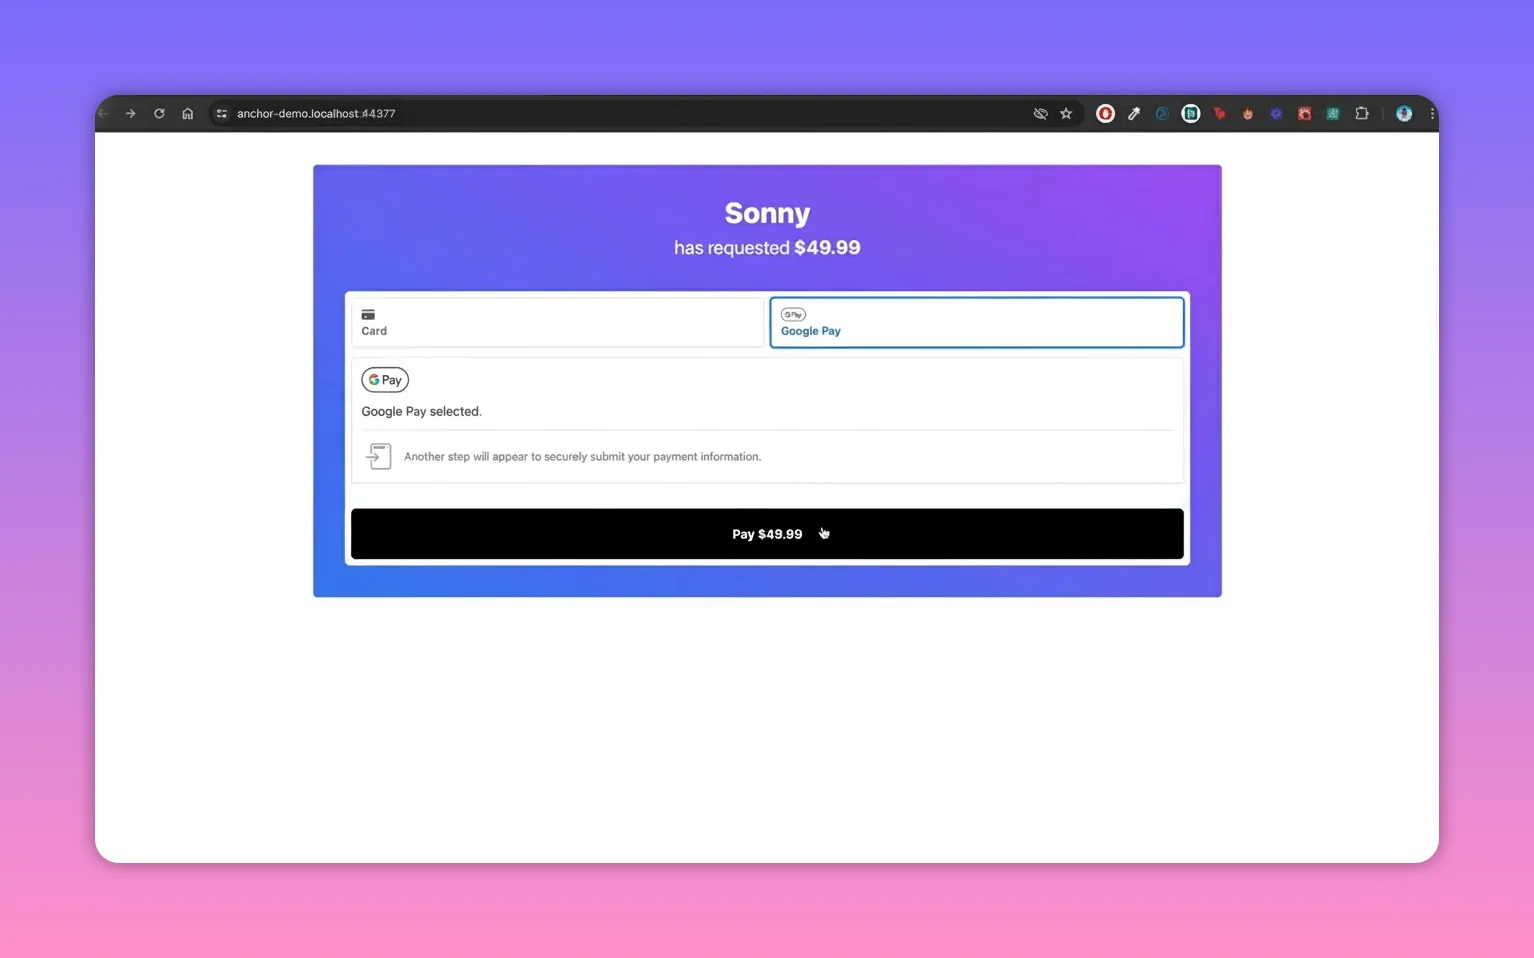
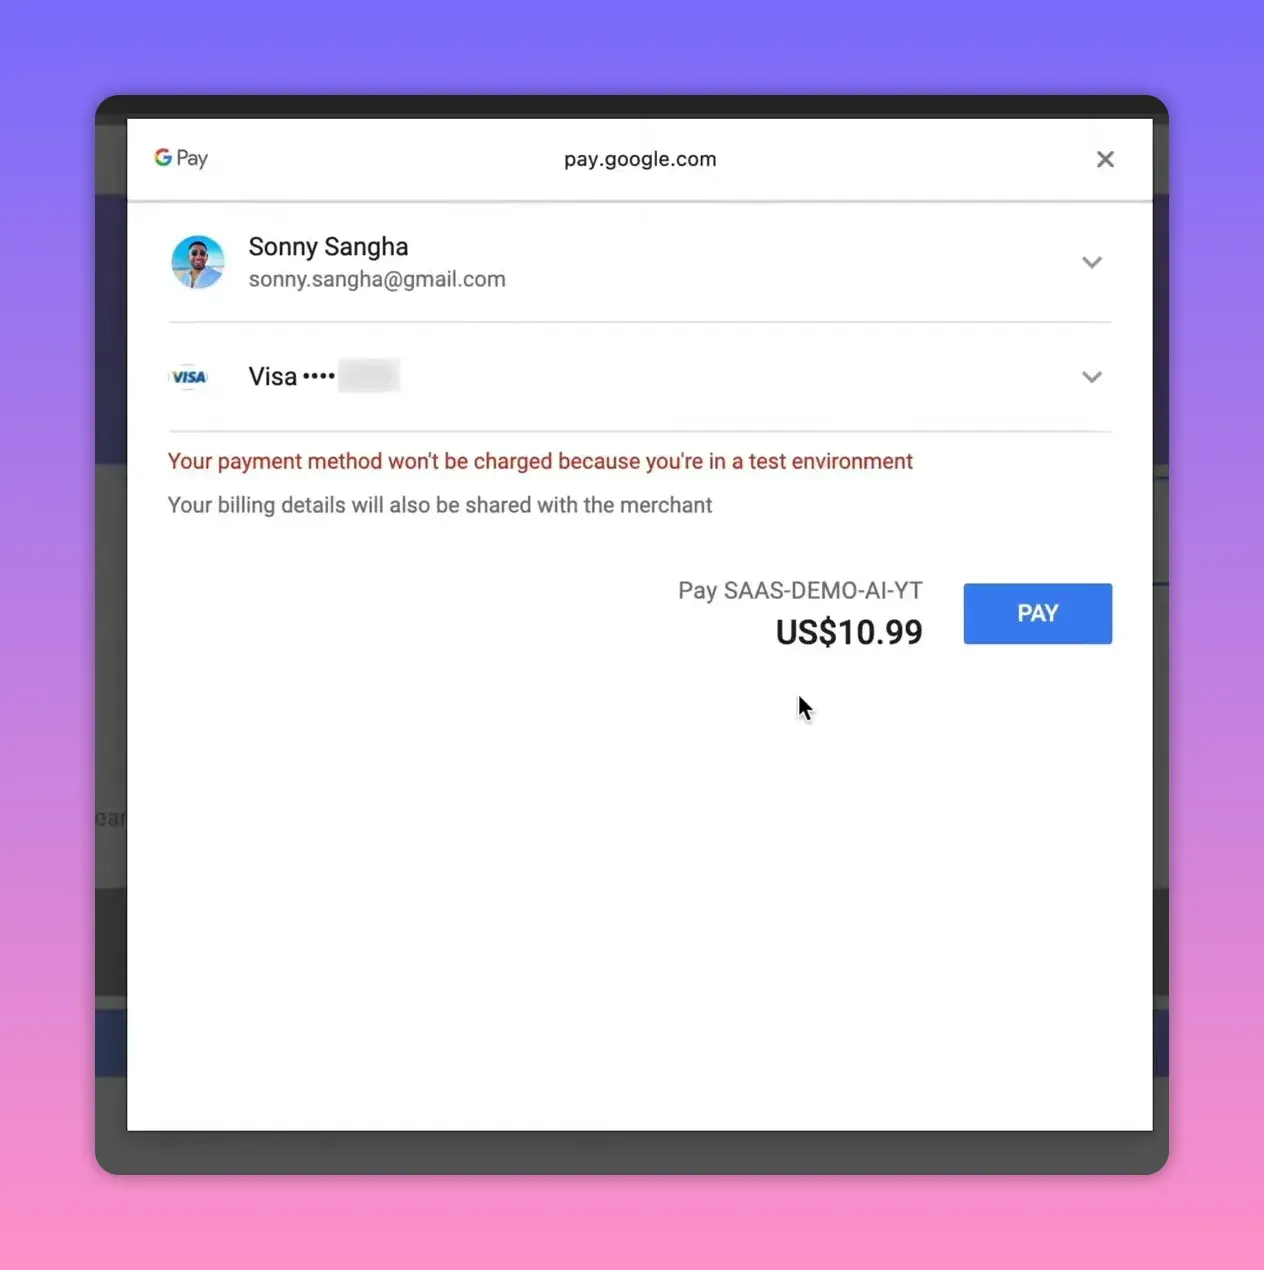
Step 5 — Test Apple Pay and Google Pay on localhost (enable HTTPS)
Apple Pay and Google Pay require HTTPS or equivalent secure contexts. By default, Next.js serves localhost over HTTP which prevents these payment methods from appearing. Use lcl.host to create locally trusted HTTPS for your Next.js app.
High-level flow to enable HTTPS with lcl.host
- Install the Anchor CLI (Homebrew or instructions on lcl.host).
- Run the lcl host setup command (e.g.,
anchor lcl) and choose Next.js. - Follow the generated instructions: install the dev package and copy the server configuration into
next.config.mjs. - Start your app with the provided local HTTPS domain. Open that domain and test Google Pay / Apple Pay in supported browsers.
The setup wizard outputs the exact next.config changes and npm package to install for you. Follow the steps on lcl.host.
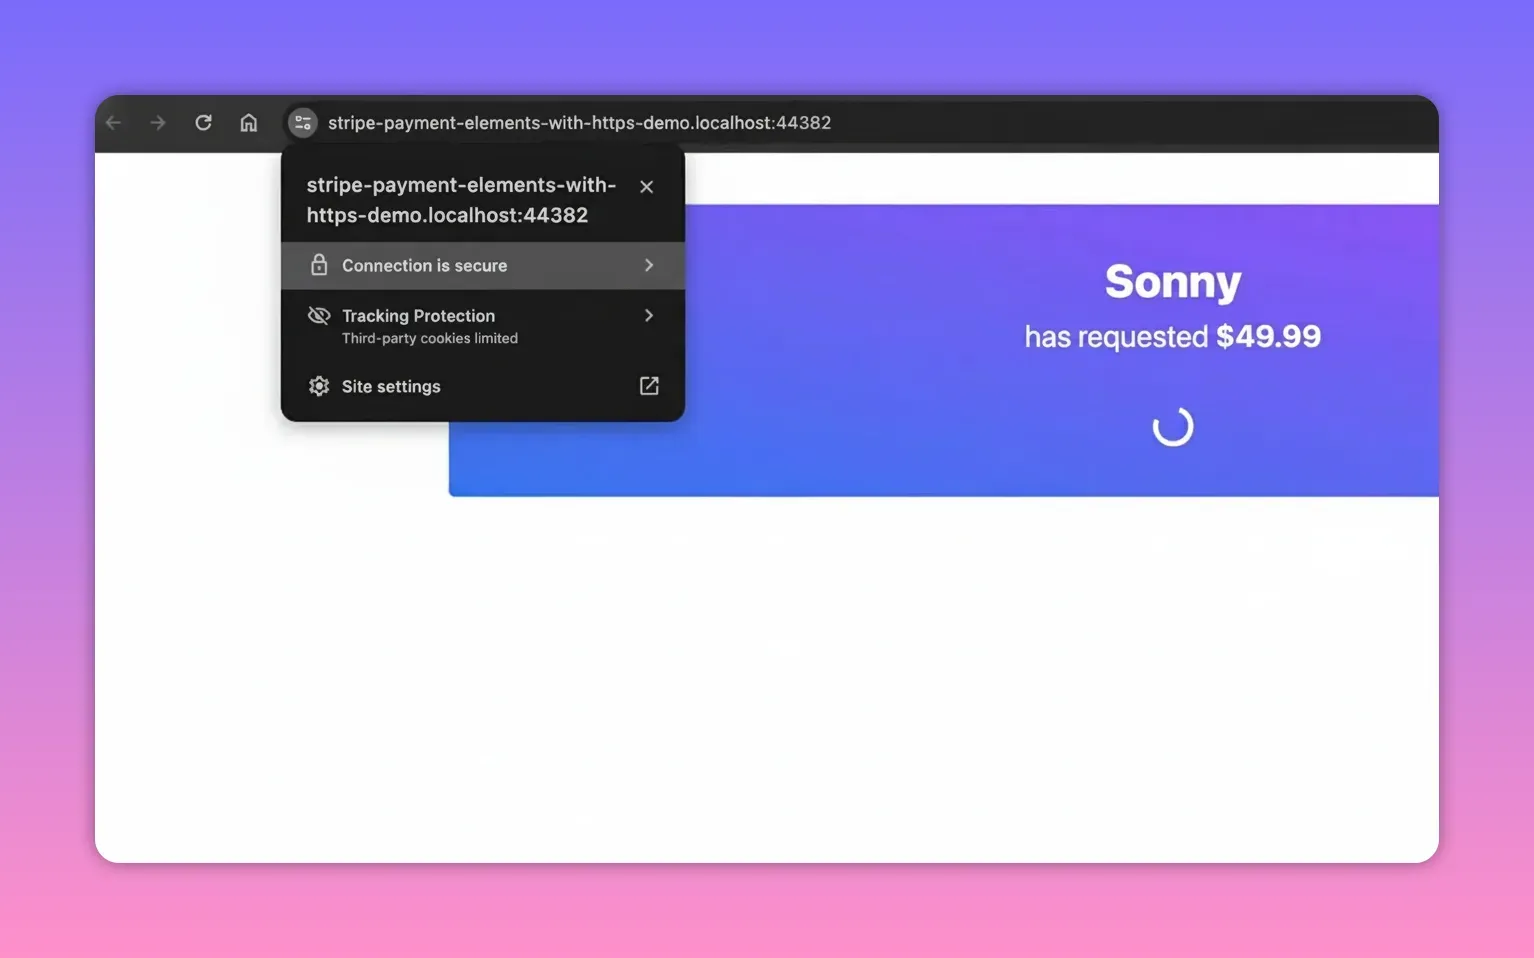
Once configured you will see Google Pay or Apple Pay appear inside the Payment Element:
Why enable HTTPS in local development?
- Production parity: HTTPS can change behavior (cookies, redirects), so matching production locally reduces surprises.
- Test browser payment methods: Apple Pay and Google Pay require HTTPS.
- Web features: Service workers, PWA features, WebRTC, and HTTP/2 power different behaviors under HTTPS.
- Third-party integrations: Many OAuth and platform integrations require secure origins.
- Offline friendly: lcl.host allows local certificate management without tunneling traffic through the internet.
Testing tips
- Use Stripe test API keys for development.
- Use the 4242... test card for card flows. Use the Payment Element for Google/Apple Pay once HTTPS is enabled.
- Check the Stripe Dashboard under Payments to inspect test payments and debug failures.
- Keep secret keys on the server only. Public keys (publishable) are safe to expose in the browser.
Helpful resources and links
- Stripe Payment Element docs
- Stripe PaymentIntent API
- Next.js Routing & Route Handlers
- lcl.host — local HTTPS for Next.js (Anchor)
- ngrok — secure tunnels (alternative)
Wrapping up
Using Stripe Payment Element plus a server-side PaymentIntent gives a secure, flexible way to accept cards and wallet payments. Adding HTTPS to your local environment with tools like lcl.host unlocks testing for Apple Pay and Google Pay and keeps local development closer to production. Keep secrets on the server, use the official Stripe libraries, and test with the recommended test cards.
If you want a complete starting point, grab the demo repository linked above and follow the README for exact commands and configuration snippets.