
This guide shows exactly where to find the Stripe webhook signing secret, how to use it to validate incoming webhook events, and best practices for testing and securing webhooks. It covers both the dashboard steps and practical server-side examples so you can receive Stripe events reliably in test and production environments.
What is a Stripe webhook signing secret and why it matters
Webhook signing secret (also called the webhook secret) is a value Stripe uses to sign the webhook payload it sends to your endpoint. Verifying that signature prevents attackers from sending forged events to your server and ensures the data actually came from Stripe.
Always validate the signature on every Stripe webhook before acting on the payload. Without this step your application risks accepting unauthorized or manipulated events.
Before you start: prerequisites
- Active Stripe account with appropriate permissions to manage webhooks.
- An HTTP(S) endpoint on your server that can receive POST requests (for example /webhook).
- Ability to store the webhook secret securely (environment variable or secret manager).
Quick overview: where to find the webhook secret in the Stripe Dashboard
- Sign in to dashboard.stripe.com.
- Open the Developers section and select Webhooks (or Endpoints / Destinations depending on UI).
- Add a new endpoint/destination or open an existing one.
- After creating or selecting the endpoint, copy the webhook signing secret (starts with
whsec_).
Step-by-step with screenshots
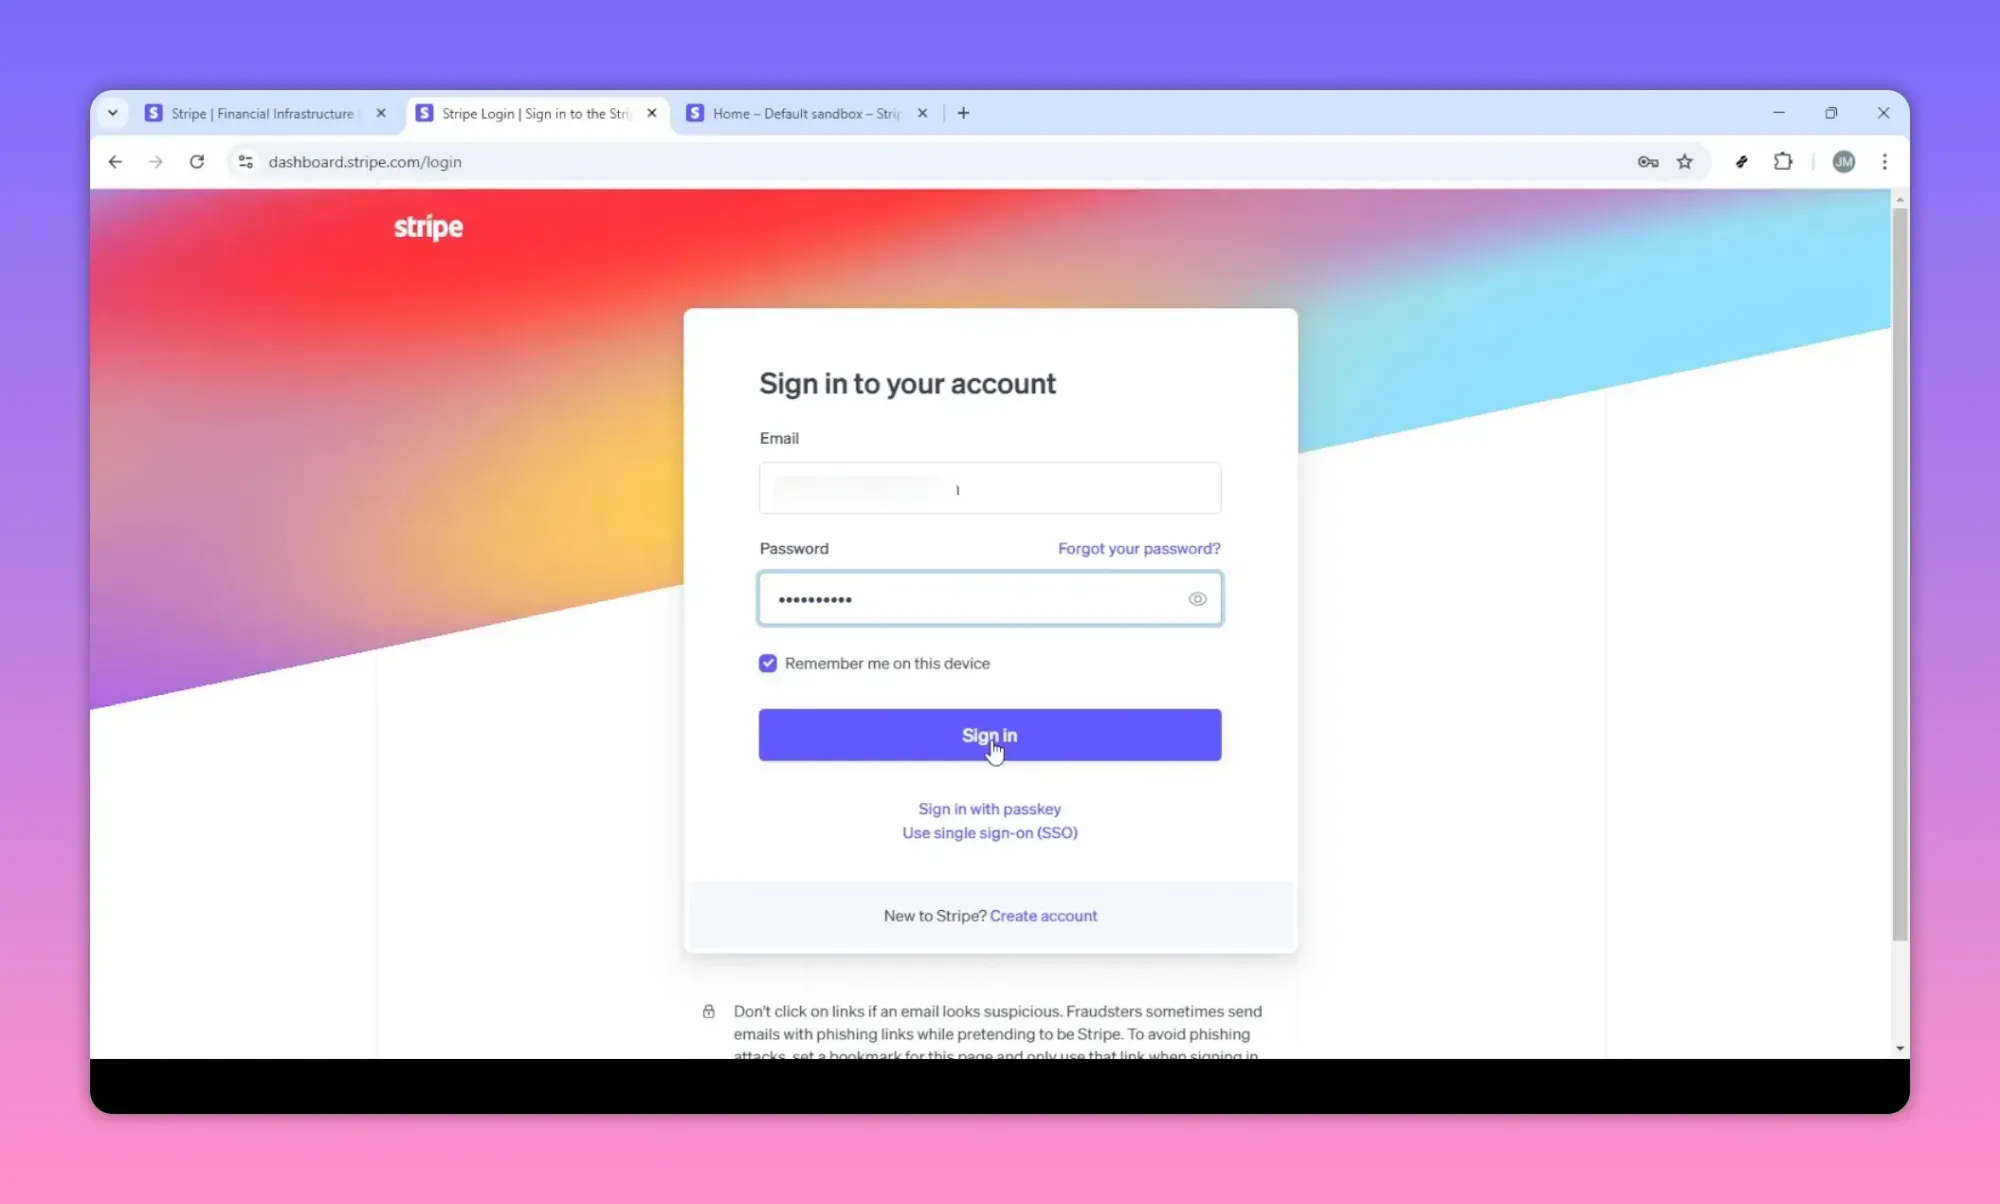
1) Sign in to your Stripe dashboard
Sign in using the account that owns the Stripe project (test vs live). Make sure you switch to the correct mode (Test or Live) before creating or copying secrets.
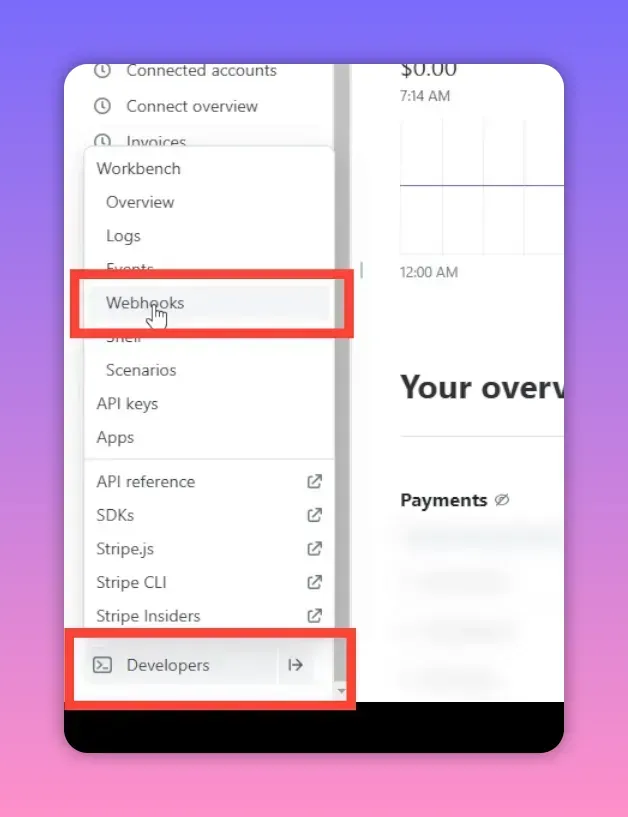
2) Open Developers → Webhooks (Endpoints or Destinations)
From the dashboard sidebar find Developers then Webhooks (labeling may differ as Stripe updates the UI). This page lists existing webhook endpoints and has options to add a destination.
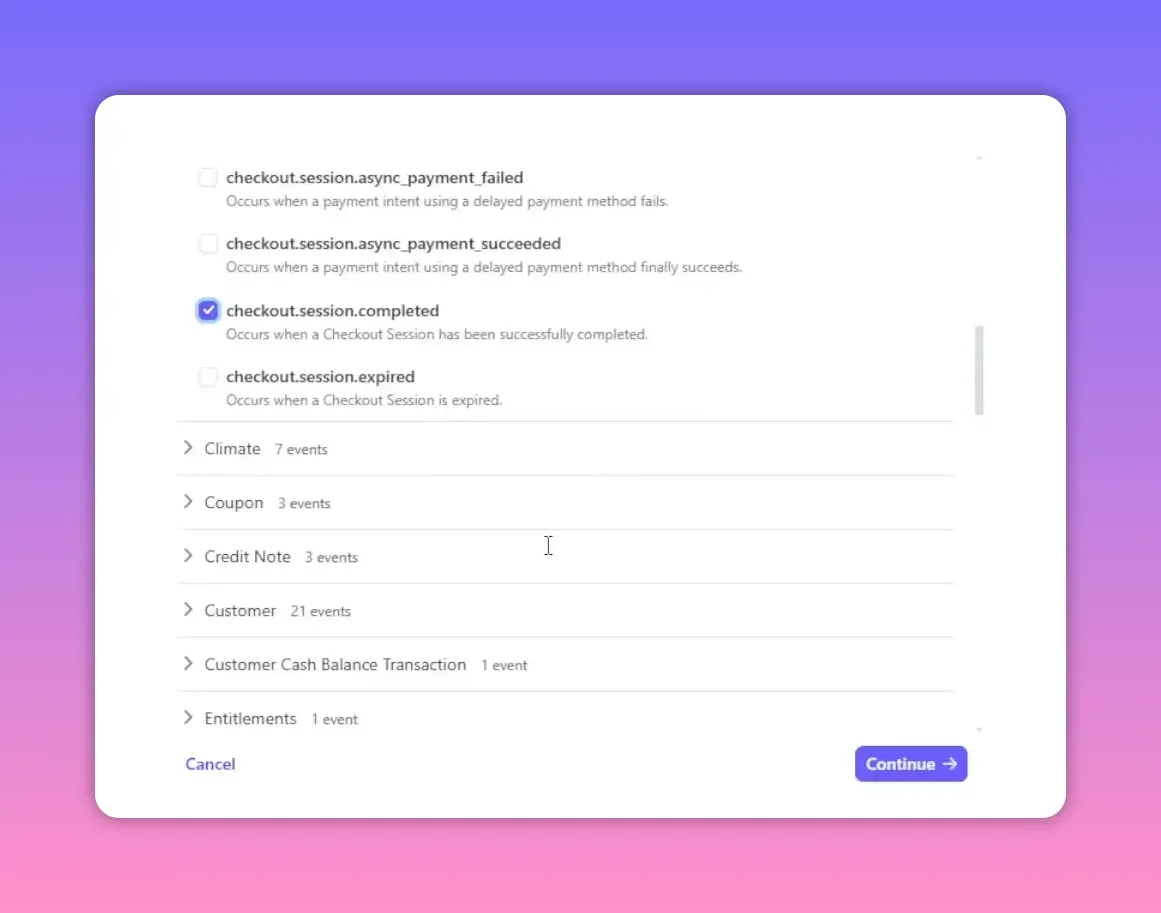
3) Create a new endpoint / destination
Click Add endpoint or Add destination. You will be asked to supply:
- Endpoint URL — where Stripe will POST events (for example:
https://example.com/webhook). - Events to send — choose the events you need (e.g.
checkout.session.completed,invoice.payment_succeeded). - Description — optional note to identify the endpoint.
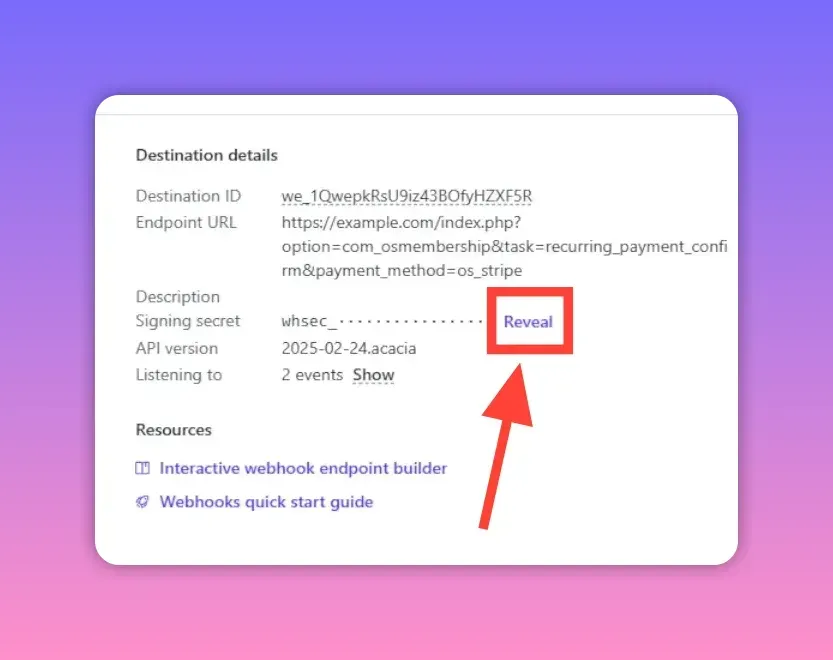
4) Create and retrieve the webhook signing secret
After creating the endpoint, Stripe shows a signing secret (or provides a button to reveal it). The secret begins with whsec_. Copy it and store it securely — for example in an environment variable named STRIPE_WEBHOOK_SECRET.
Common event names you will use
- checkout.session.completed — fired when a Checkout Session completes successfully.
- invoice.payment_succeeded — fired when an invoice payment succeeds.
- payment_intent.succeeded — when a PaymentIntent completes successfully.
How to verify webhook signatures (server-side examples)
Stripe sends a header called Stripe-Signature with each webhook. Use Stripe's official SDK to verify the signature using your webhook secret. Always use the raw request body when constructing the event.
Node.js (Express) example
const express = require('express');
const stripe = require('stripe')(process.env.STRIPE_SECRET_KEY);
const app = express();

// Use raw body parser for the webhook route
app.post('/webhook', express.raw({type: 'application/json'}), (req, res) => {
  const sig = req.headers['stripe-signature'];
  const secret = process.env.STRIPE_WEBHOOK_SECRET;

  let event;
  try {
    event = stripe.webhooks.constructEvent(req.body, sig, secret);
  } catch (err) {
    console.error('Webhook signature verification failed.', err.message);
    return res.status(400).send(`Webhook Error: ${err.message}`);
  }

  // Handle the event
  switch (event.type) {
    case 'checkout.session.completed':
      // process completed checkout
      break;
    case 'invoice.payment_succeeded':
      // process invoice payment
      break;
    default:
      // unexpected event type
  }

  res.json({received: true});
});

app.listen(3000);
Python (Flask) example
import os
import stripe
from flask import Flask, request

app = Flask(__name__)
stripe.api_key = os.environ['STRIPE_SECRET_KEY']
endpoint_secret = os.environ['STRIPE_WEBHOOK_SECRET']

@app.route('/webhook', methods=['POST'])
def webhook():
    payload = request.get_data()
    sig_header = request.headers.get('Stripe-Signature')

    try:
        event = stripe.Webhook.construct_event(payload, sig_header, endpoint_secret)
    except ValueError:
        return 'Invalid payload', 400
    except stripe.error.SignatureVerificationError:
        return 'Invalid signature', 400

    # Handle event
    if event['type'] == 'checkout.session.completed':
        pass

    return '', 200
Testing webhooks safely
- Use Test mode in the Stripe dashboard while developing so no real charges occur.
- Dashboard test events: from the Webhooks page you can send specific test events to a chosen endpoint.
- Verify the raw body: many frameworks modify the request body. For Node/Express use
express.raw()for the webhook route.
Stripe CLI: listen for events and forward them to your local server:
stripe listen --forward-to localhost:3000/webhookCommon mistakes and gotchas
- Using the wrong mode: copying a Test secret into production or vice versa will cause verification failures.
- Exposing the secret: never include the webhook secret in client-side code or commit it to source control.
- Not using raw request body: frameworks that pre-parse JSON will break signature verification unless the raw body is used.
- Using publishable keys: publishable keys (pk_) are not valid for verifying webhooks. Use the webhook signing secret (whsec_).
- Forgetting to handle retries: Stripe retries failed deliveries. Design idempotent handlers to avoid duplicate processing.
- Ignoring multiple secrets: Stripe supports multiple signing secrets for an endpoint (useful during rotation). Keep them until rotation completes.
Rotating webhook secrets safely
Rotate webhook secrets periodically or if you suspect a compromise. Stripe lets you create new secrets and keep old ones active during a transition. Steps:
- Create new signing secret in the dashboard for the endpoint.
- Update your server to accept both old and new secrets (if supported) or deploy updated secret quickly.
- Confirm that events verify against the new secret.
- Remove the old secret from Stripe once confident the new secret is in use.
Checklist before going to production
- Store webhook secret in environment variables or a secrets manager.
- Verify signatures on every request.
- Use HTTPS for your endpoint URL.
- Test end-to-end using the Stripe CLI and dashboard test events.
- Make handlers idempotent and log events and failures for debugging.
- Monitor webhook delivery rates and failures in the Stripe dashboard.
Quick troubleshooting
- If verification fails, confirm you copied the entire signing secret and you are in the correct (Test vs Live) mode.
- If your server returns non-2xx responses, Stripe will retry. Check logs for errors and timeouts.
- If you receive duplicate events, ensure your processing is idempotent (use event IDs or metadata to dedupe).
Short summary
Finding the Stripe webhook signing secret requires creating or selecting a webhook endpoint in the dashboard, then copying the whsec_ value and storing it securely. Always validate the Stripe-Signature header using Stripe's SDK and use the raw request body. Test locally with the Stripe CLI, keep secrets out of client code, and rotate secrets when necessary.